Hemming pants is a fundamental sewing skill that allows you to customize the length of trousers for a better fit and a neater appearance. This guide provides a step-by-step breakdown of the hemming process using a sewing machine—no professional tailor required.
Prepare the Necessary Tools
Before starting, gather your materials. You’ll need:
- A pair of pants that need hemming
- A sewing machine with matching thread
- Fabric scissors or rotary cutter
- Seam ripper
- Measuring tape or ruler
- Pins or sewing clips
- Iron and ironing board
- Tailor’s chalk or a washable fabric marker
Every item plays a role in ensuring neat results. Having everything within arm’s reach can prevent interruptions during sewing.
Try on the Pants and Measure
Put on the pants while wearing the shoes you’ll most often pair with them. Cuff the bottoms to your preferred length, then use pins or clips to hold the new hem in place.
Next, remove the pants carefully. Lay them flat on a table and use your measuring tape to determine how much fabric you’re removing. Double-check that both legs are pinned evenly to avoid uneven hems.
Mark the New Hemline
Use tailor’s chalk or a fabric-safe marker to draw a clear line where you want the new hem to sit. Once marked, remove the pins and unfold the fabric. Make sure to leave extra fabric—around 1 to 1.5 inches—below your marked line. This allowance will be folded under to form the hem.
Trim the Excess Fabric
Carefully cut away the excess fabric below your seam allowance line. Use sharp fabric scissors or a rotary cutter for clean, straight edges. Ensure you don’t cut too close to the mark; some extra length helps in creating a sturdy hem.
Fold and Press the Hem
Fold the bottom edge up once to hide the raw fabric edge. Press it flat with an iron. Then fold it a second time to encase the cut edge fully. Press again for a crisp finish. Pressing at both stages keeps the fold sharp and easier to sew.
Consistency in folding is key. Use a ruler if necessary to make sure the hem width is uniform around both legs.
Secure with Pins or Clips
Pin or clip the folded hem all the way around. Position pins perpendicular to the edge, pointing inward. They help keep the layers in place as you sew and prevent slippage.
Avoid pinning through too many thick layers at once—this could cause your machine needle to jam or break.
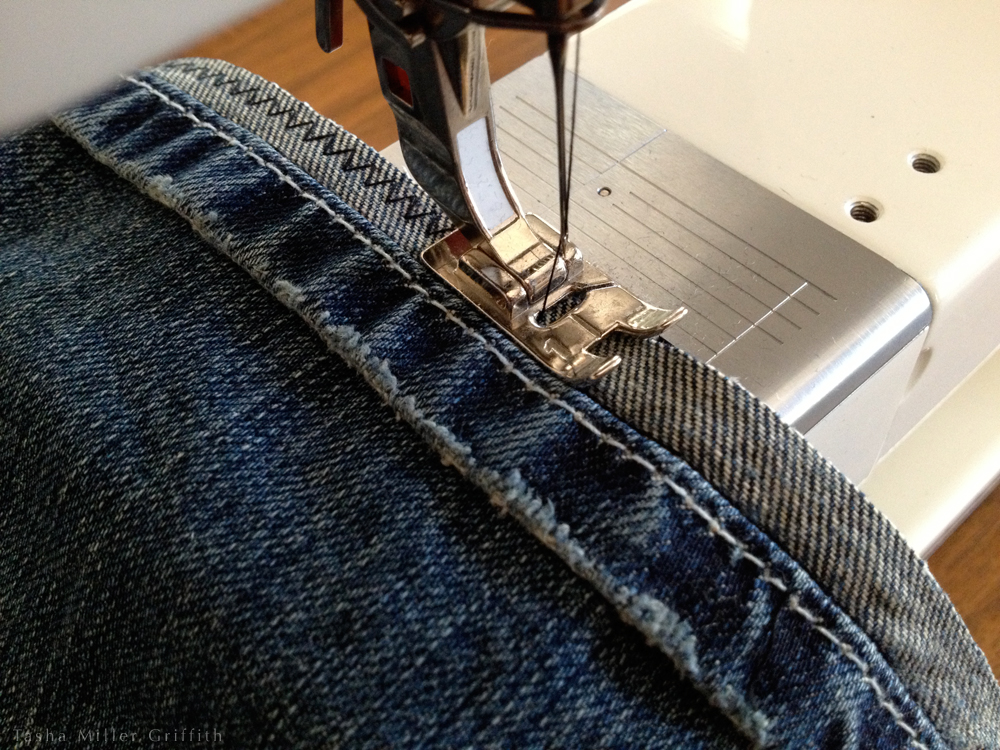
Set Up the Sewing Machine
Choose a straight stitch on your sewing machine. Use thread that matches your pants to blend the seam. Set the stitch length to a medium setting—around 2.5 mm works well.
Thread the needle properly and do a test stitch on scrap fabric, preferably from the cut-off pant legs, to check tension and stitch quality.
Sew the Hem
Begin sewing on the inside leg seam so your starting point is less visible. Sew slowly around the entire leg opening, staying close to the folded inner edge.
Remove pins as you go. Don’t sew over them—it can damage your machine or needle. Use your hands to gently guide the fabric and maintain an even stitch line.
Backstitch at the beginning and end of the seam to lock it in place.
Press the Finished Hem
After both legs are hemmed, iron them again. This final press flattens the stitches and sharpens the crease, giving the pants a professionally finished look.
If necessary, use steam for heavier fabrics. For delicate materials, use a press cloth to avoid shiny spots or scorching.
Inspect and Try On
Once done, turn the pants right side out and inspect your work. Check for loose threads, uneven stitching, or puckering. Try them on again with your shoes to confirm the length feels and looks right.
Make any minor adjustments before considering the job finished.
Final Thoughts
Mastering the process of hemming pants with a sewing machine gives you greater control over your wardrobe. Whether you’re tailoring thrifted finds or altering new purchases, the ability to adjust hem length saves time, money, and effort. With each project, your confidence and precision will grow—turning a basic task into a valuable lifelong skill.